


When you have a homestead, sometimes you want something to decorate areas for the animals. This is why I started making DIY Feed sack Christmas stockings for my chicken coop area. I had some cute wreaths we had made to put on the outside of the coops, but wanted something to hang on the chicken run.
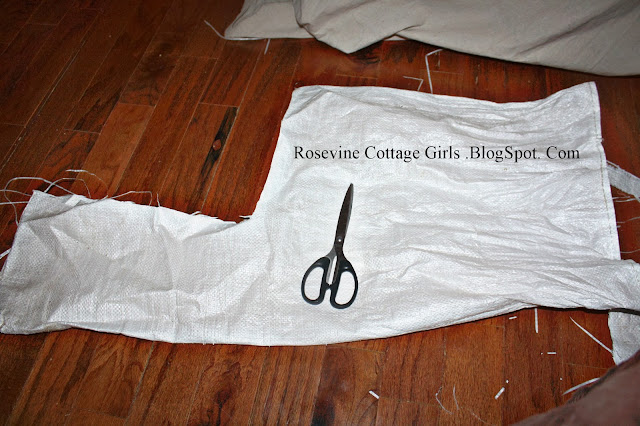
So I have all these feed bags lying around with nothing to do with them, and well, I decided to play around with them. I had seen a photo on Facebook where someone had taken theirs and cut them into stockings to use to decorate their coops. So I grabbed a stocking from the mantel and used it as a pattern, cutting around it and leaving enough room for a 5/8″ seam allowance all the way around the sides and extra for the top part.

After you cut the two pieces of the stocking, flip them so that the right sides are together and the inside is on the outside and then sew along the side edge at 5/8″ mark stopping before you get to the top edge. I zig-zagged around the edges to keep the Christmas stocking from falling apart, since the material is a woven plastic, I wanted to give it extra stability.
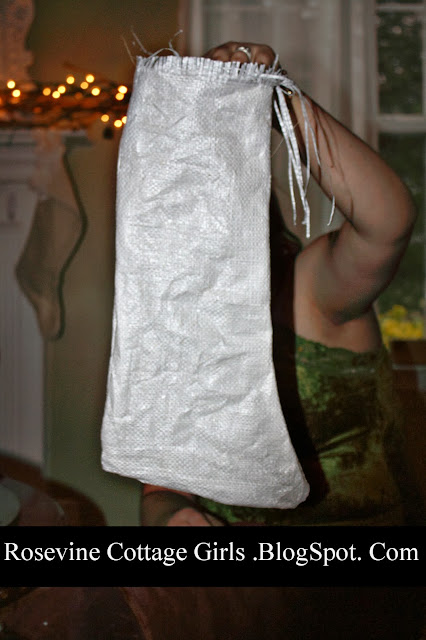
Now, flip the stocking so the outside is on the outside of the stocking and the stitches are hidden within. Take the top par,t and flip that part of the top over to make a cuff. Stitch around the opening in a circle making sure you are not sewing it closed. You want to go around in a circle. The weave of the bag was really loose, and it kept unraveling, so I put a seam at the edge of the unraveling part too, just letting it make a fringe. So you will have a seam around the bottom fringe edge and then the top edge where the opening is. It will be easier to do the bottom first and then the top but I didn’t think about that at the time until I noticed how bad the unraveling was.

Then I decide to add some embroidery to the cuff.

This is the whole stocking. You can trim off the shaggy parts at the top if they bother you, but I kind of liked it!
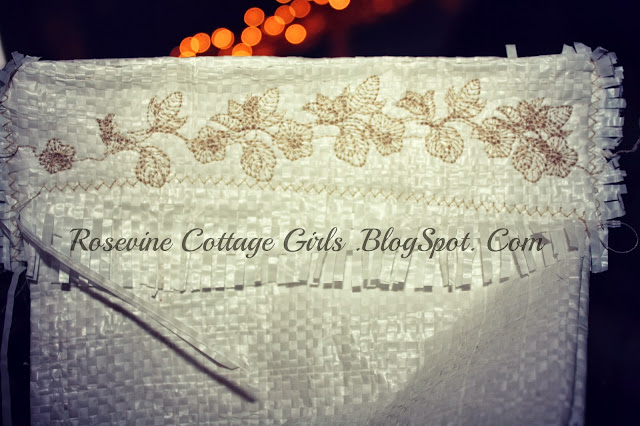
This is the embroidery. It was hard to see in the other picture, not so close up. It seemed to help to hold the top part down. If you do not have an embroidery machine, you can omit this or just do a straight stitch to hold things down. The shape is better when you stuff them. I used plastic shopping bags to give it some shape. They are waterproof and help to hold the seams better. Something that pressing would do if I used a non-plastic material for making my stockings. You can also fill it with straw to stick out the top, and you can add things into the stocking if you want.
Next, you can add the animals’ names on the stocking using Paint, Glitter, and glue, or even cut them out of felt and glue the letters on that way. I used these in my chicken coop with some garland, and I thought it was a cute touch for Christmas.
Check out our other articles here:
- Easy DIY Chicken Water Heater For Winter For Under $10
- Christmas Decor For The Bathroom
- Beautiful Gift Wrapping Ideas For Christmas


