


Imagine growing a thriving garden where each plant carries the legacy of seasons past. That’s the magic of saving seeds. Whether you’re a backyard gardener or a container-growing city dweller, learning how to save seeds can transform your gardening game. It’s cost-effective, sustainable, and just plain satisfying.
Why Saving Seeds Matters
Saving seeds isn’t just about stretching your gardening budget (though that’s a big perk). It’s about creating a self-sufficient, eco-friendly garden that grows stronger each season. When you save seeds from your healthiest, most productive plants, you’re also saving their genetic wisdom—plants adapted to your unique climate, soil, and care style.
Plus, preserving heirloom seeds helps maintain biodiversity, keeping rare plant varieties alive for future generations. It’s like being part of a quiet gardening revolution.
This post contains affiliate links, read our privacy policy for more information.
The Benefits of Saving Seeds
1. Save Money: Forget buying new packets every spring. Once you learn how to harvest seeds from your own vegetables and flowers, your garden practically pays for itself.
2. Stronger Plants: Seeds saved from your garden grow more resilient over time, adjusting to your local environment and growing conditions.
3. Preserve Biodiversity: Heirloom and open-pollinated varieties are often hard to find. Saving them helps protect genetic diversity in our food supply.
Best Plants for Seed Saving
If you’re new to seed saving, start simple. Some plants are easier than others.
- Tomatoes (especially heirloom varieties): Easy and rewarding.
- Beans: Just let the pods dry on the plant.
- Peppers: Pick from fully ripe fruits.
- Lettuce: Let it bolt and collect the fluffy seed heads.
Understanding self-pollinating vs. cross-pollinating plants is key. Self-pollinating plants like tomatoes and beans are beginner-friendly. Cross-pollinating plants (like corn or squash) can be tricky because they may not grow true to type unless properly isolated.
Also consider whether you’re working with annuals or perennials. Annuals complete their life cycle in one season, making them ideal for yearly seed saving.
The Seed Saving Process: Step-by-Step
1. Choose the Right Seeds: Always save seeds from healthy, mature, and disease-free plants. Stick with open-pollinated or heirloom seeds, not hybrids, which might not grow true to the parent plant.
2. Harvest and Clean Seeds: Each plant type is a little different:
- Wet seeds (like tomatoes): Scoop, ferment in water for a few days, rinse, and dry.
- Dry seeds (like beans, lettuce): Allow to dry on the plant, then collect and clean by hand or screen.
3. Dry Seeds Properly: After cleaning, let the seeds dry completely. Use paper towels or mesh screens in a cool, dry place.
4. Store Smart: Place your seeds in labeled envelopes or jars. Store them in a cool, dark, and dry place. A Mason jar in the fridge works great. Avoid moisture—it’s the #1 seed killer!
Want to learn more about saving seeds? Check out this book Seed to Seed, or The Seed Saving Bible.
Avoiding Common Mistakes
Hybrid Confusion: Hybrids might produce unpredictable offspring. Always check seed packet labels.
Poor Storage: Keep seeds away from heat and humidity. Even the best seeds won’t germinate if they’ve been improperly stored.
Cross-Pollination Risks: If you’re growing multiple varieties of the same species (like squash), they can cross-pollinate. Use physical barriers or plant them far apart.
How to Test Seed Viability
Not sure if your saved seeds will sprout? I’ve seen so many people posting about how they if they need toss seeds that were a little bit older and I always cringeHere’s a simple germination test:
- Place 10 seeds between moist paper towels.
- Seal in a plastic bag.
- Keep warm for a few days.
- Count how many sprout.
If 8 out of 10 germinate, you’ve got an 80% viability rate. Not bad! Remember, seed longevity varies. For example, tomato and bean seeds can last 4-6 years if stored well.
How To Make Seed Envelopes :
- Card stock
- Scotch Tape
- Scissors
- Glue Stick
- Sharpie

Step 1: Slice a piece of card stock in half, fold over leaving enough for a flap.
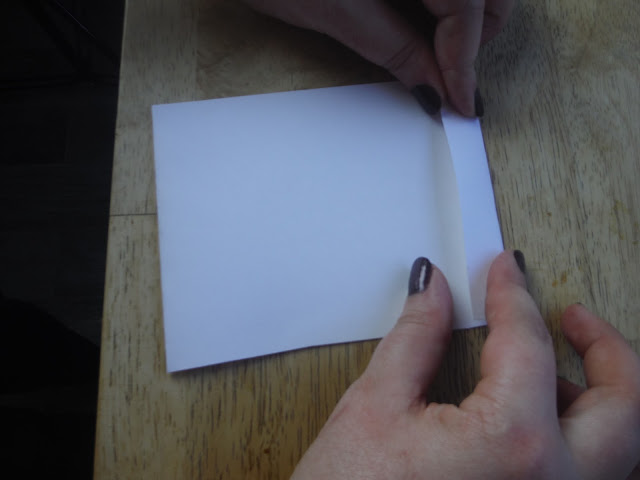
Step 2: Fold the flap over and press down.
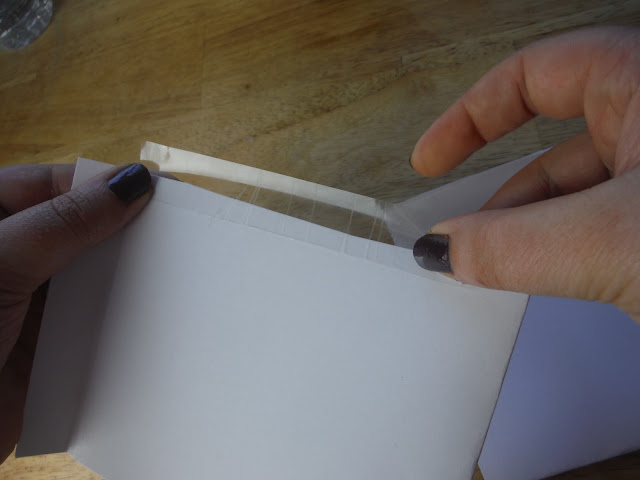
Step 3: Tape around edges except for the top. Scribble what you are putting in it on the front and fill with seeds. Glue the flap shut.
Saving Seeds
Saving seeds is more than a gardening technique—it’s a lifestyle choice that brings you closer to nature, your food, and the rhythms of the earth. It saves money, supports sustainability, and deepens your connection with every seed you plant.
So, why not start today? Try saving seeds from your next ripe tomato or bean pod. It’s easier than you think!
Have you tried saving seeds before? Share your experiences in the comments, or join a local seed exchange to trade varieties with fellow gardeners. Let’s grow a stronger future—one seed at a time.
Check out these other articles:
- How To Build A Raised Bed Garden |
- How To Propagate Mint In 4 Easy Steps
- How To Build A Raised Bed Garden | Easy DIY Tutorial
- Easy Homemade Raised Bed Soil Mix
- The #1 Beginner Guide How To Grow Tomatoes At Home
- The Ultimate Guide How To Grow Peppers
- The Best Garden Subscription Boxes For The Backyard Gardener


